Updating the SSL keys, every year 🙁 on stand alone ESXi servers is a PITA.
To make things worse, there are no EASY instructions out there how to do it. VMware wants you to create PEM files or something… just a pain in the butt.
I found a posting on Filecloud, they have easy to follow instructions on enabling SSH and installing new keys. Works, easy & quick.
Everyone knows SSD kicks the crap out of spinners.
Everyone knows RAID 5 is too slow for writing to disk, generally RAID 10 is used these days.
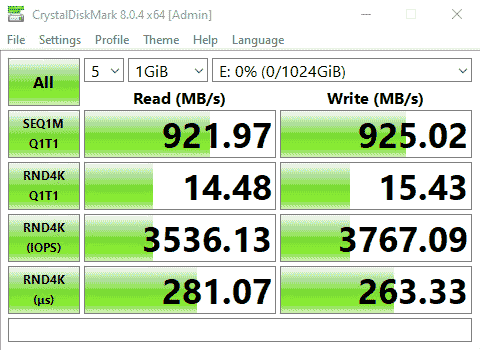
Lets do some comparisons, using CrystalDisk Mark 8.0.4, using default values except setting the profile to Real World Performance rather than the default.
The machine I am conducting the tests are is not super modern, the hardware is:
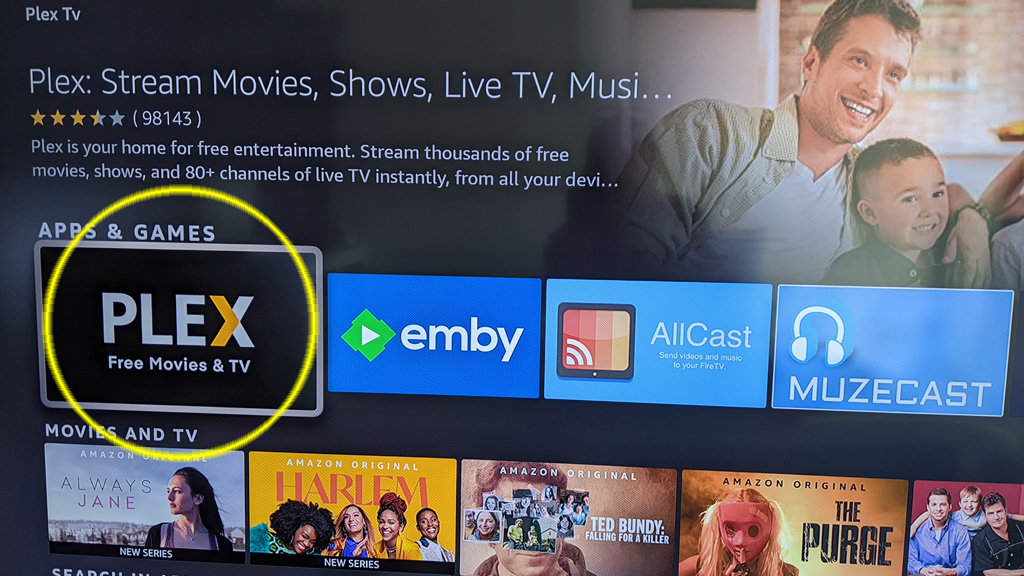
The following steps document the setup of PLEX on an Amazon Firestick, as of December 2021. These will certainly be outdated as Amazon’s interface continues to change.
Step #1 – Load the search box
We are going to open the search box, select Find to get started.
Step #2 – Search for PLEX
Select the search option and search for the word PLEX.
Step #3 – Finding the software
Look for an app with an icon as in the photo below, that is the PLEX app that you want to install on your Firestick.
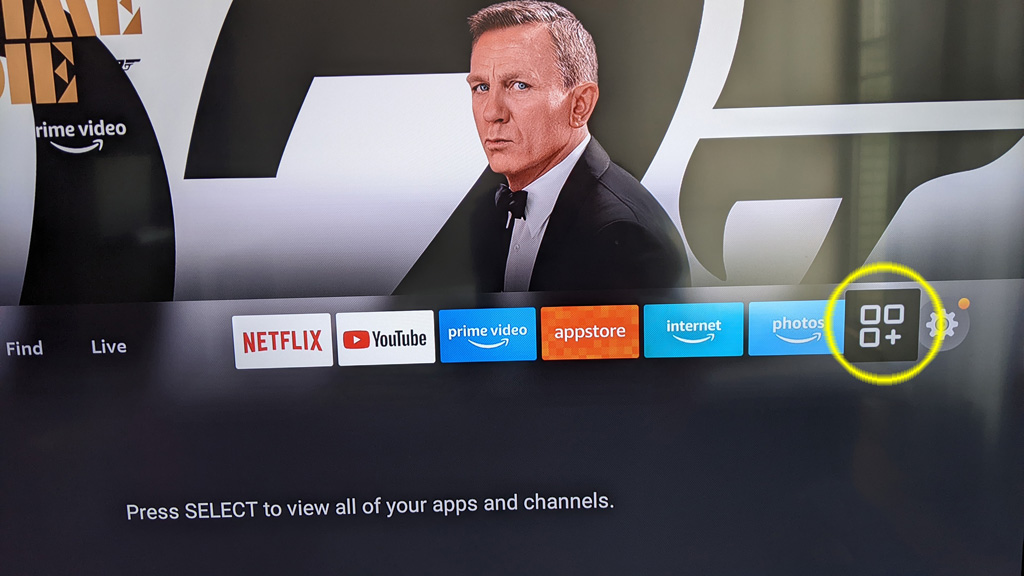
Step #4 – Position PLEX on your quick access bar.
Since you will be using PLEX a lot on your TV, lets move it to your quick access bar (if it is not there already). To do that, select the apps icon, which appears on the right side of the quick access bar.
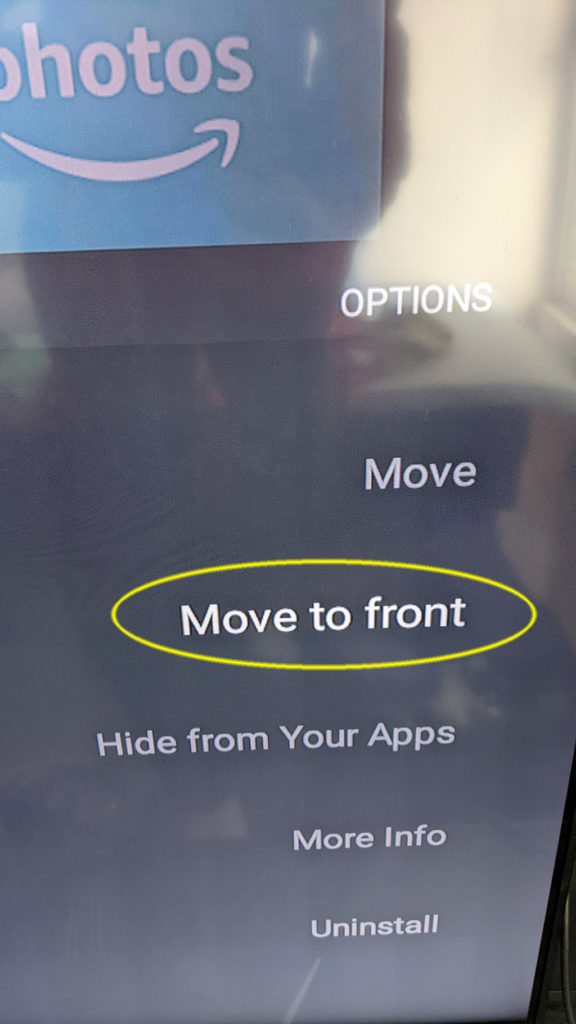
Step #5 – Move PLEX to front
Once on your apps page, find PLEX and highlight the icon using your cursor – but do not select it. If you accidently select it, it will open and that is not what we want right now so hit the Home button on your remote and start again from Step #4.
With PLEX highlighted, press the hamburger button on your remote. The hamburger button is a button with 3 (or 4?) horizontal bars.
This will bring up a little menu on the right side of the screen. Select the Move to front option and it will position PLEX at the front of your quick access bar on the Firestick homepage.
Step #6 – Launch PLEX
At this point, PLEX should be installed and easily accessed from your quick access bar. Lets jump back to the homepage, press the Home button on your remote (looks like a little house?).
PLEX should appear as the first item on your quick access bar, select it to launch PLEX.
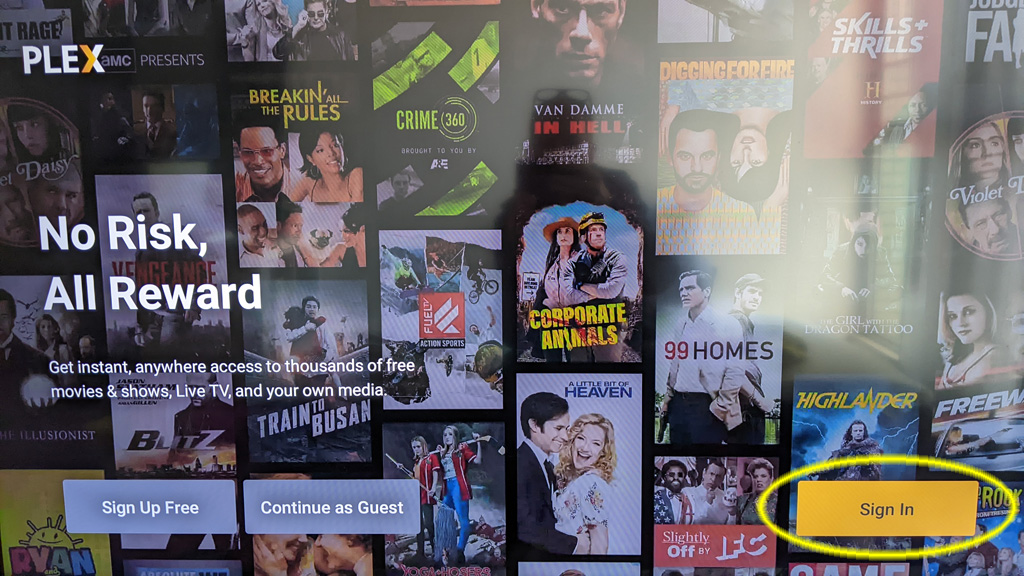
Step #7 – Sign In
With PLEX opened the 1st time, they want you to login so they know who you are. I have already created an account for you.
From the 1st page, move the cursor over to Sign In and select it.
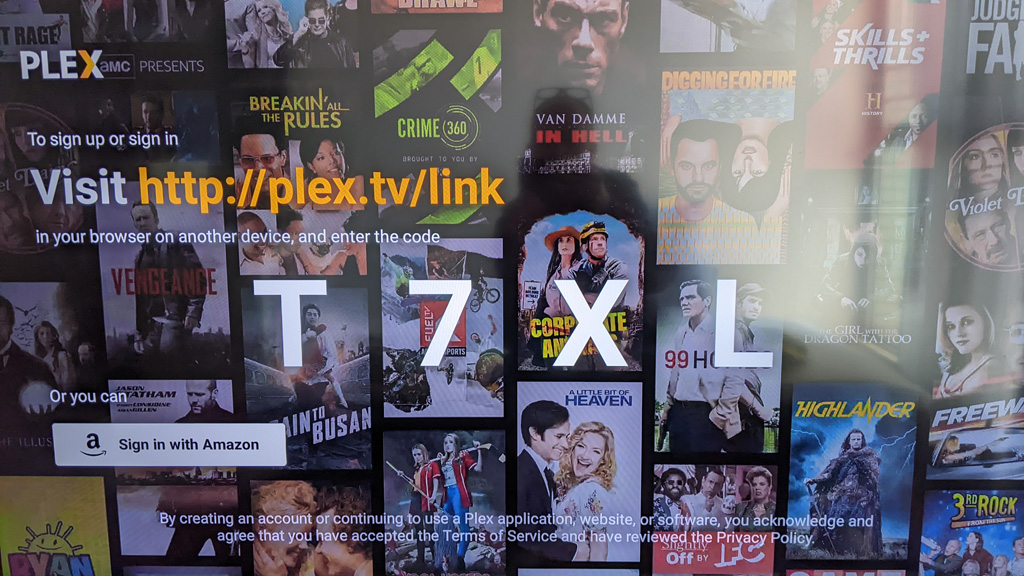
Step #8 – Authentication
If you have made it to this point, you will be asked to visit some other URL and enter some weird numbers. Please call me to complete this step for you.
A random YouTube suggests video thought I would be interested in winter boot slip testing. A lab in Ontario is doing the testing of winter boots, they post all their results on a website that is free to view (unlike Consumer Reports stuff): Rate My Treads
A quick glance at their site, I think I would go with Marks Rundle Waterproof Hyper-Dri 3. Quite a mouthful, but they are affordable and at least get some positive vibes on the Rate My Treads site.
A year+ ago I wanted to try and setup OTA TV. I’m not exactly a cord cutter as I actually have never subscribed to Cable TV in my life.
However, some people in my household wanted access to local news… so my quest began.
Vernon BC – Broadcasters
I will focus this article specifically to Vernon BC as that is where my antenna is located.
Broadcast Tower
The entire city has coverage from rebroadcast tower located on Turtle Mountain (I think that is what it is called), North of Davison Orchards at about 800m. The distance is about 3km to the center of Vernon. Plenty close enough for most any antenna to pickup the signal, there are technically two channels:
Channel 20 – CHBC-DT-2
Channel 22 – CHKL-DT-2
Unfortunately, they both broadcast Global Okanagan or Global BC. With an exception of what time the news comes on there is no difference between the two channels.
Having the two channels does not give you extra TV shows. 🙁
The TV Antenna
I purchased a fairly large TV antenna with the plan to mount it not directly to the TV but rather put it in a storage room connected to a DVR that could record TV shows. These days no one wants to tune in at 6:30 and watch the news (and commercials) so a recording system is a must.
There is no such thing as a HD antenna and no such thing as an antenna that can pickup a signal for hundreds of miles away. That is just marketing. Browse over to Antanna Man on YouTube to learn about antennas. I think I paid about $100USD for my antenna and it works just fine.
Since the broadcast tower is quite close, you should not require a massive antenna.
DVR #1 – Tablo
For my DVR / tuner device I initially went for a Tablo, which is produced by a company in Canada. I was interested in this device because there was no ongoing subscription cost, if you are trying to cut the cord why do you want to pay any ongoing monthly fee.
I was also attracted to the fact that you could watch TV from any tablet or smart phone or smart TV in your house. It also allowed access from a remote site over the Internet.
Sounds great, watch TV from YOUR own antenna anywhere in the world – very convenient!
The device works great for viewing in your own home. However, the way they have implemented security for remote access really SUCKS! If you have a 2nd home or cabin at the lake you must physically take the device you want to watch TV on to your primary house. You must authenticate a viewing device (phone, tablet or TV) by putting it on the same network as your Tablo device you authenticate. Then you can watch from a remote site.
It totally sucks if you have a 65 inch TV located in a remote location, it means you would have to physically take your 65 inch TV to the location of the Tablo, authenticate and then take it back.
Imagine having to take your TV from your house in Florida up to Canada to authenticate and then take it back.
That was a deal breaker for me. I dumped the device and tried something else.
DVR #2 – PLEX
At that point I learned about some software named Plex, it is designed for watching TV & movies. Many people watch movies they have downloaded from the Internet using this software (not something I will get into here).
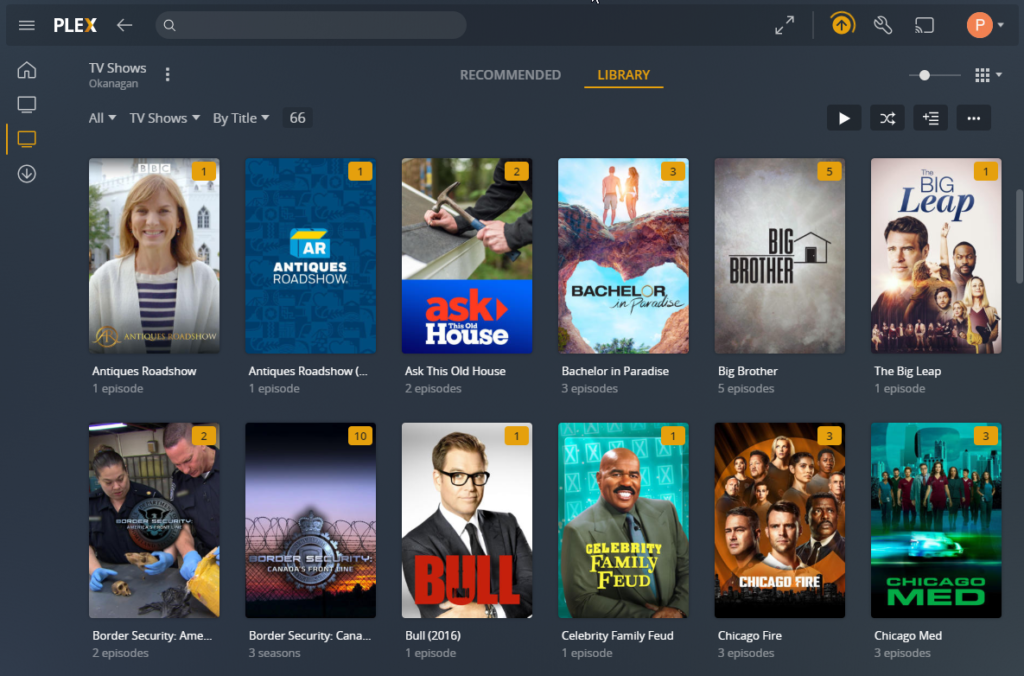
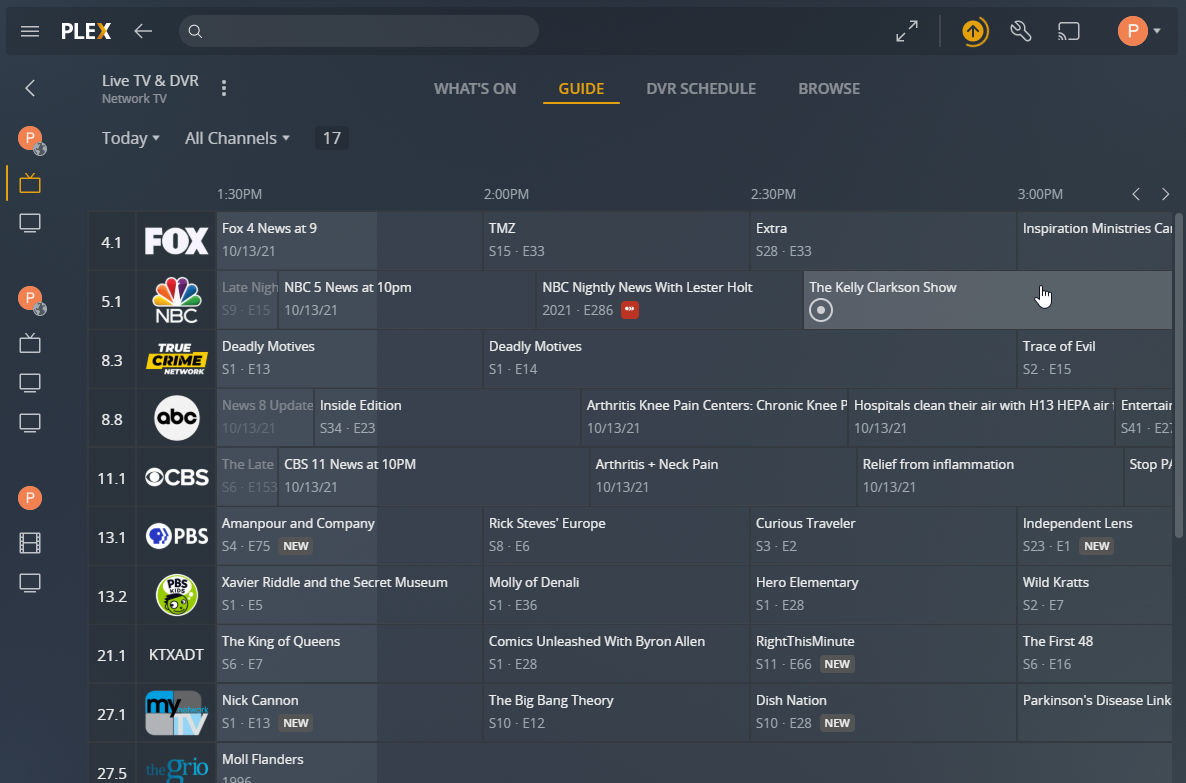
It also has the ability to connect to a TV tuner and record shows directly from your TV antenna. It then integrates all your movies / tv into a large multi-media collection. Watch live TV from your antenna or anything you have chosen to record. It has a TV guide system built in, you can select to record any TV show or series automatically.
A complete TV guide of all your channels, lets you find what you want to watch or record.
Oh, best of all, you can connect remotely from any device with no crazy authentication system like Tablo.
I paired the Plex Media Server with tuner called HD HomeRun, I believe they have models that can tune from 1 – 4 channels at a time.
The Result
I am quite happy with my current setup I can have 10+ users connected and watching TV with no issues at all.
Back in August 2016 I wanted to try and build a Ceph cluster. A the time one of the only Single Board Computer (SBC) with a SATA port was the Banana PI.
I bought a few 3tb hard drives (2.5 inch), 4 Banana PI machines and some Odroid C2 machines to use as controllers.
It was very easy to setup the Ceph cluster, but the performance was terrible. For Ceph to work you really need a high speed back channel for machines to replicate between.
I deployed the hardware for other purposes and called the experiment a failure.
Today I found this post on reddit. Turns out Hardkernel has released a machine called Odroid-HC2. It integrated a SBC with passive cooling and the ability to directly connect a 3.5 inch drive up to 12tb.
The guy on reddit deployed glusterfs on 20 of them, apparently glusterfs does not use so much bandwidth to keep the cluster in sync. His performance numbers are impressive.
I’m not going to build out a cluster of these at this time, but it certainly looks like a fun project.